
Today, I’m invited by John to learn how to carve in bones. He has been doing this for 25 years as a hobby. He told me that, one day, some people from UK approached him and bought 4 pieces from him and put them in a museum in London :-).

John’s workshop has a lot of tools but he is very well organized if I compare with a certain garage of my grandpa 🙂 haha.
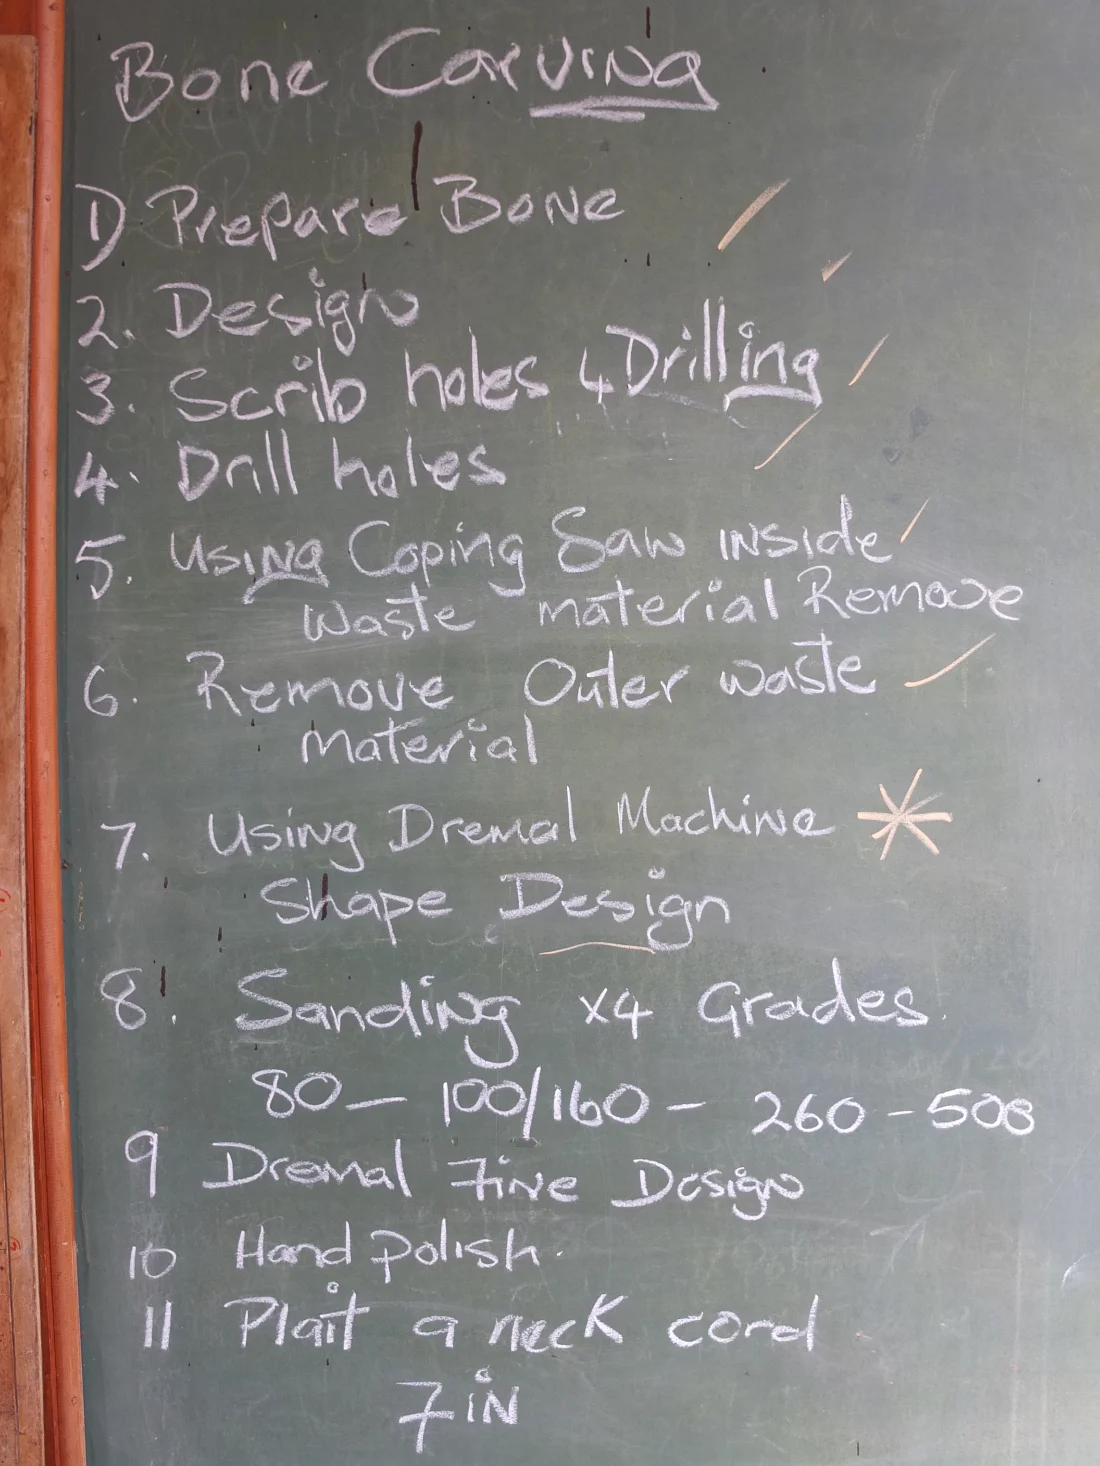
These are all the necessary steps I need to follow to realize any shape. Firstly, John will create one piece to show me the process. Then it will be my turn.

The butterfly on the left hand side was his first creation. Now, it’s my turn.
Step 01: I have to choose the right size for the thing I want to make and clean it.

Step 02: Draw the design (a circle in my case).
Step 03: Scrib the hole before drilling
Step 04: Drill the hole.
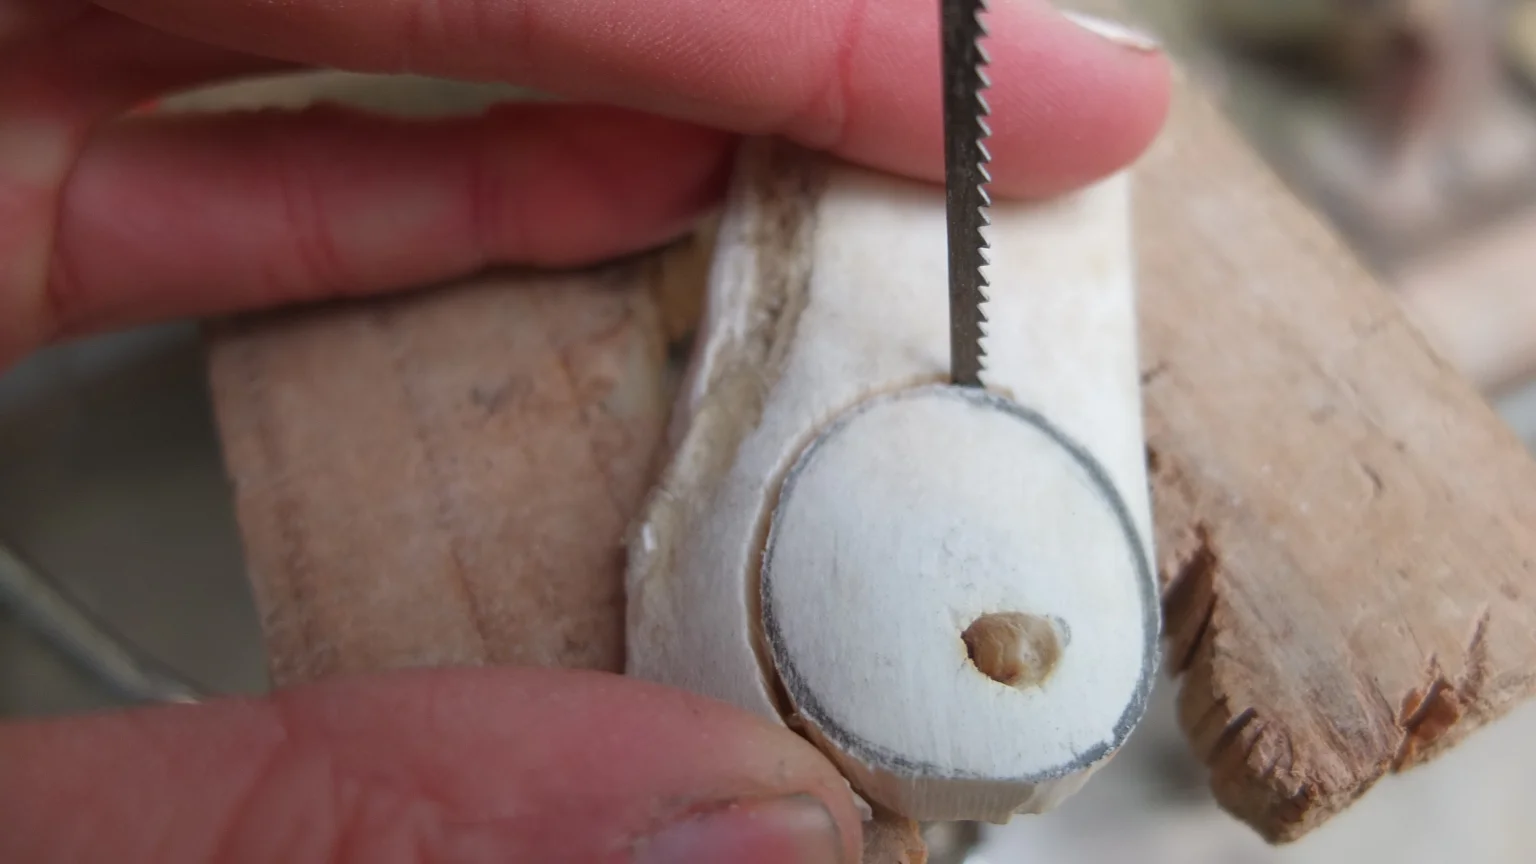
Step 05: Cut roughly the shape with a saw, by hand.

My piece is ready for drilling :-).
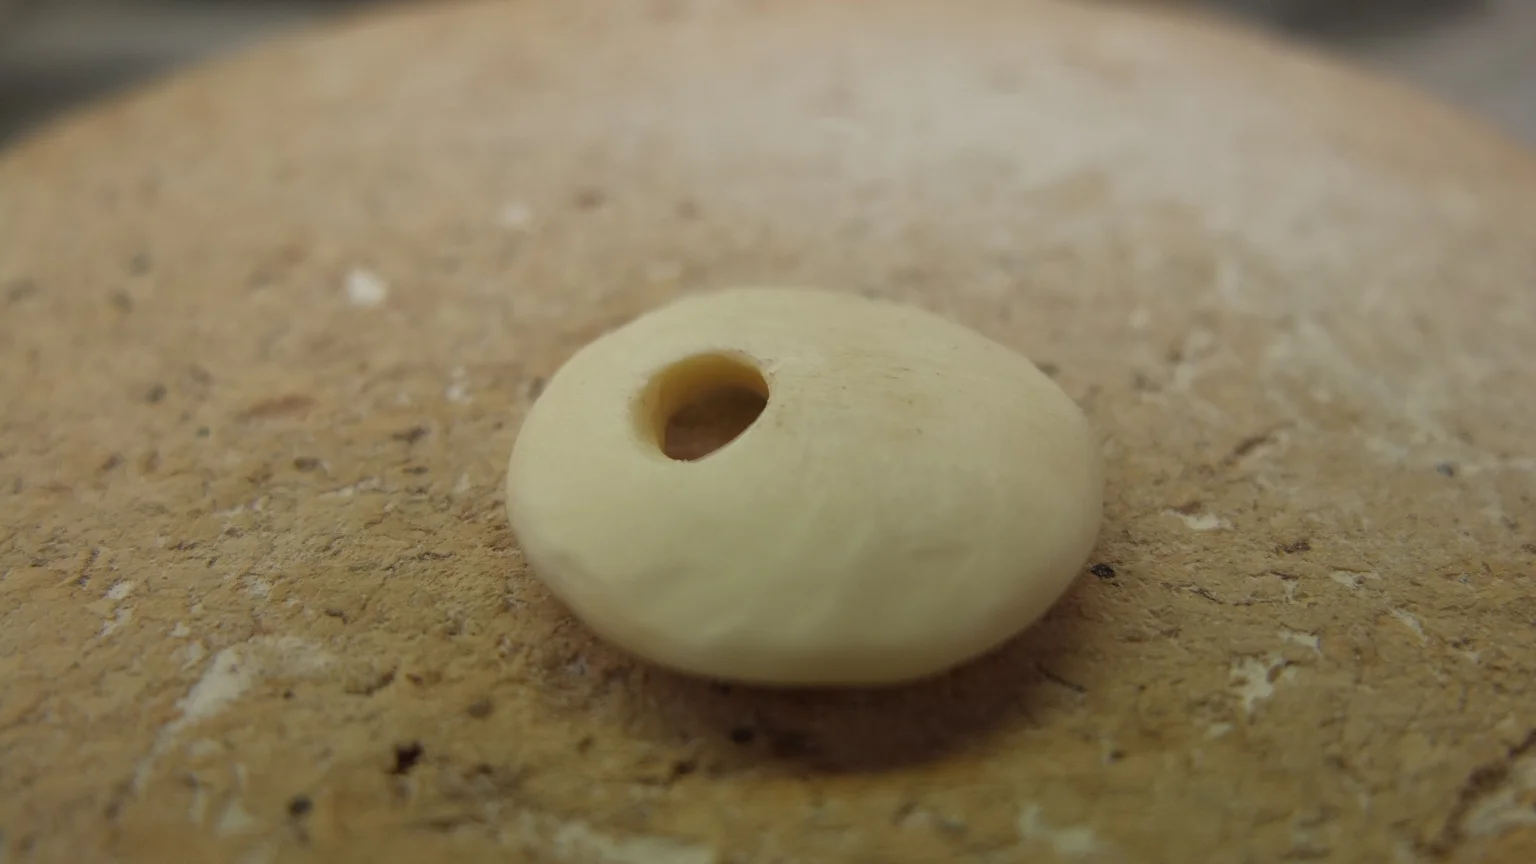
Step 06: Remove outer waste material.
Step 07: Use the Dremal machine to create a rough design
That’s it :-). The main shape is almost finished. Now I’m going to use sand paper to smooth the surface.
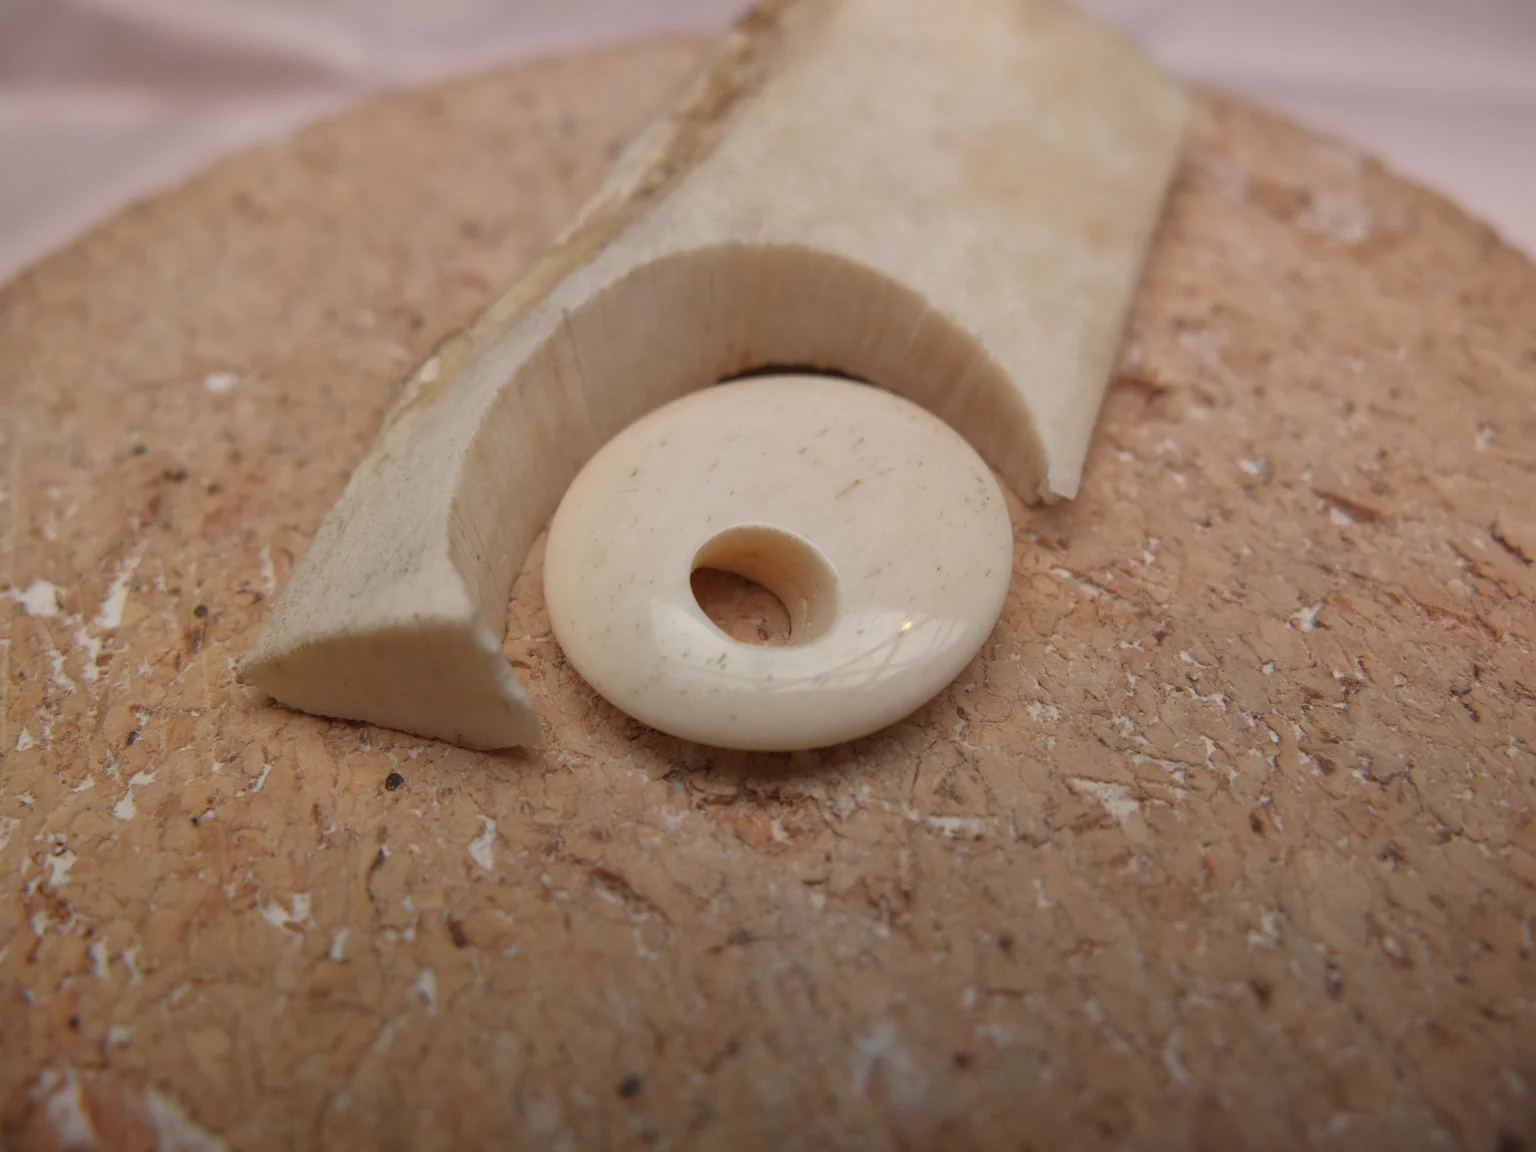
Step 08: Sand progressively the shape from 80 to 100-160 to 260 to 500.
It starts to look very good now 🙂 Compare to the beginning piece of bone, the difference is huge!
I planed to have a shiny side and a rough side.
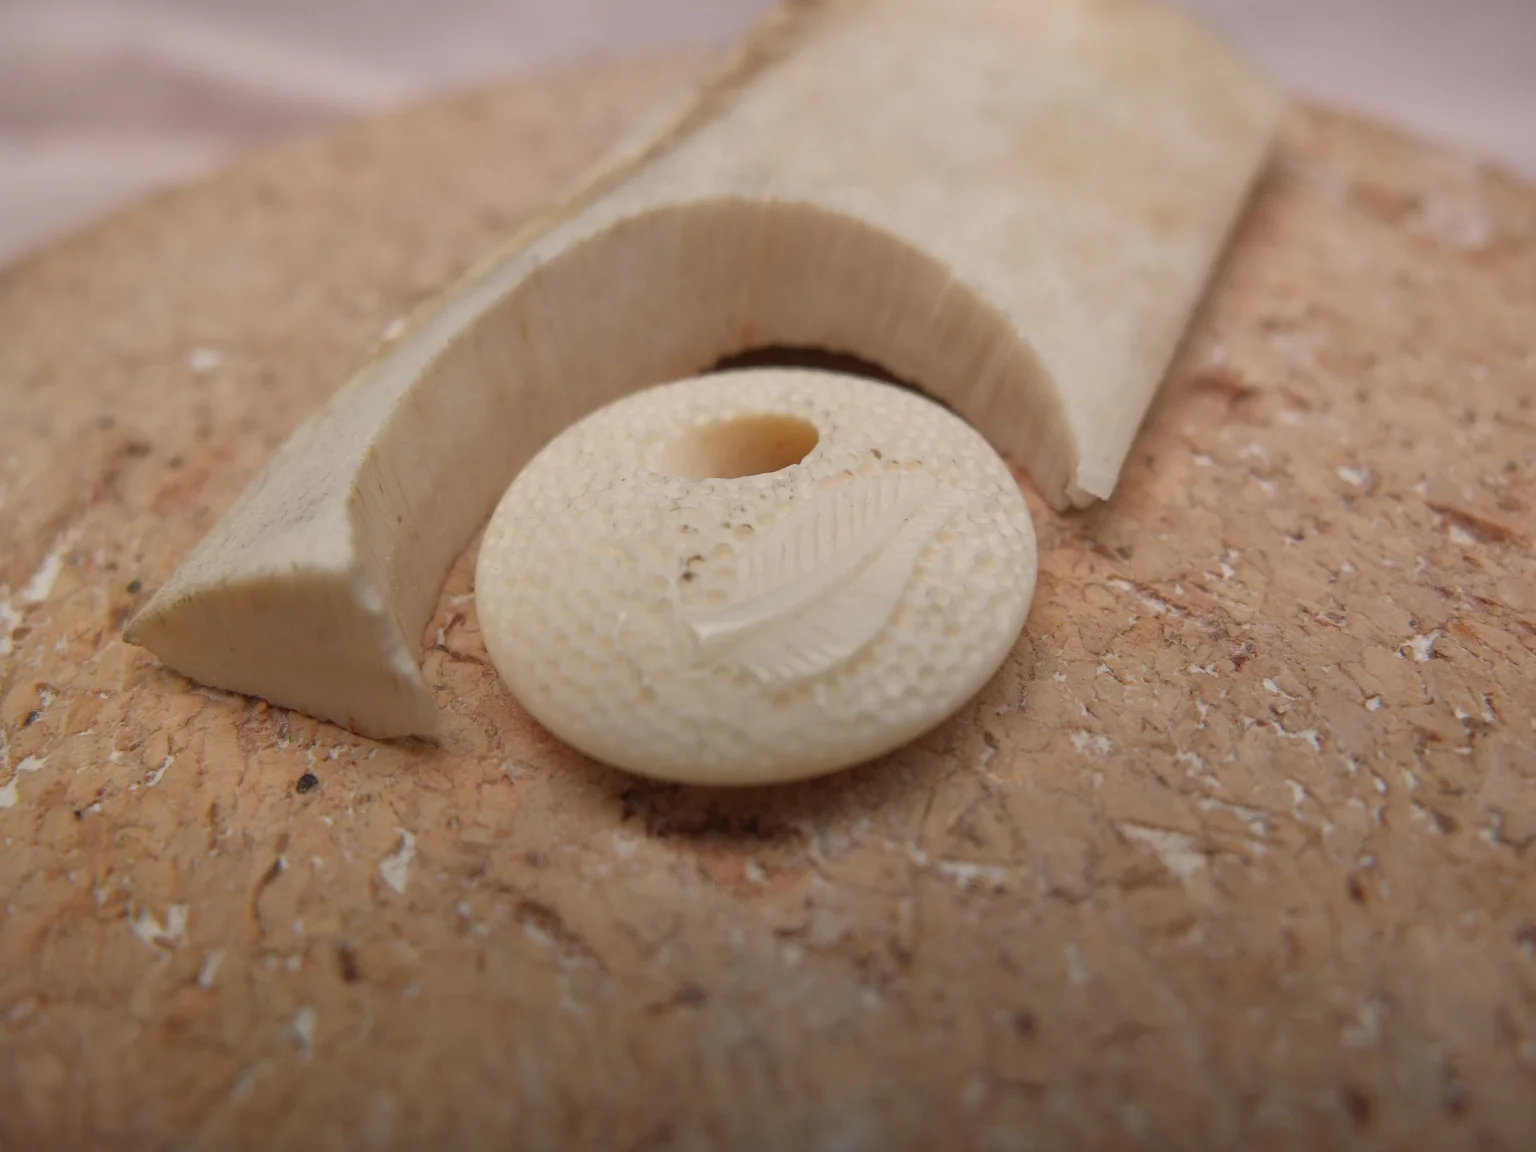
Step 09: John used his Dremal to had details on the back side. He also added his signature, the famous New Zealand leaf 🙂

Step 10: Hand polish the final shape.
Step 11: Add the neck cord which I will do once I find the right one.
Learning and creating my own bone took 5 hours. Thank you John for your patience and kindness. That was a great experience. I’ll remember this day 🙂
A while later

We got hungry and after a good lunch, Caila prepared some ice cream with bananas for dessert.
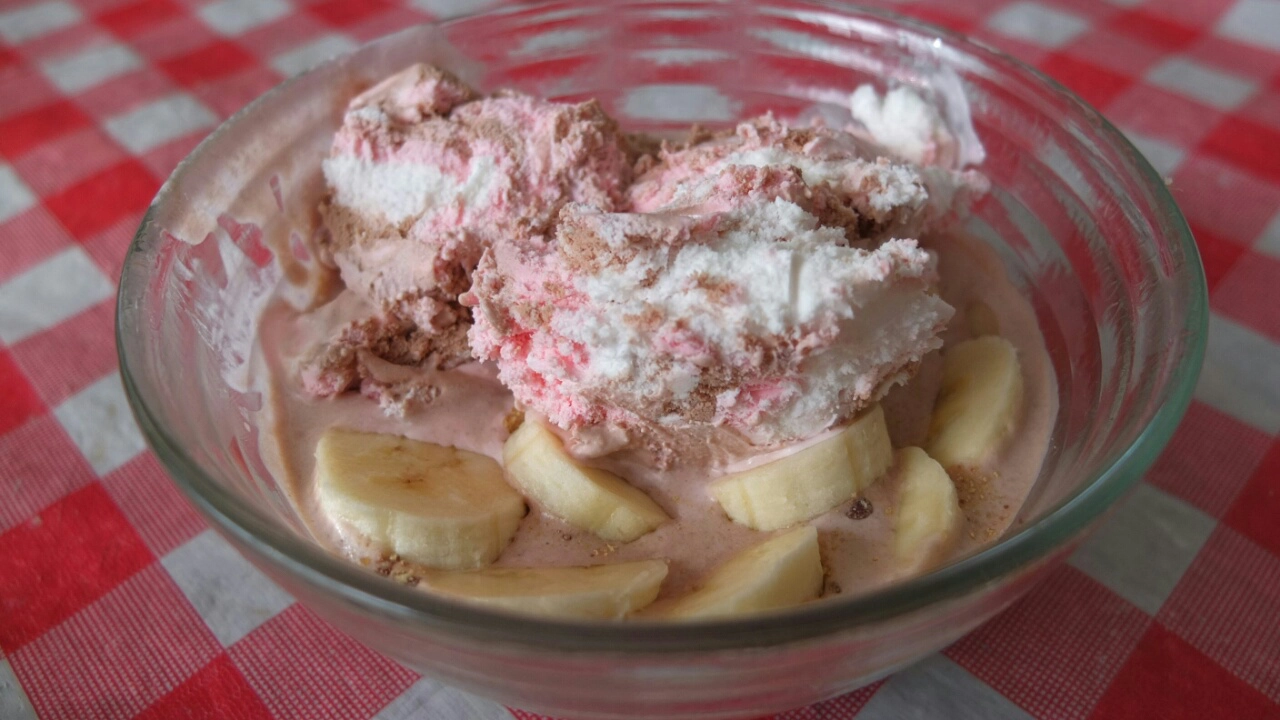
Ah, and of course, with more ice cream it’s better 🙂
Super Damien ! C’est un pendentif ? On ne se rend pas compte de la taille réelle en fait. En tout cas, ce souvenir là sera vraiment concret, tu pourras le toucher tous les jours!
Hello, oui oui c’est un pendentif et ça fait la taille d’une rondelle de banane 🙂 Merci! 🙂
L’os appartenait à un boeuf mais je ne lui ai rien fait moi!
C’est beau!! 🙂
Wahhhhouhhh C’est chouette le bijou en os !!! ça devait pas être fastoche à réaliser !!! Mais le résultat est top !! Bon en tout cas je vois que tu manges toujours autant de bon p’tits plats heyhey !! Enjoy it !!! kisssouuuu
Hey Marie, oui c’était vraiment agréable d’apprendre a tailler l’os. Et on peu vraiment pousser dans les détails même si ce que j’ai réalisé est simple.